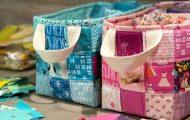
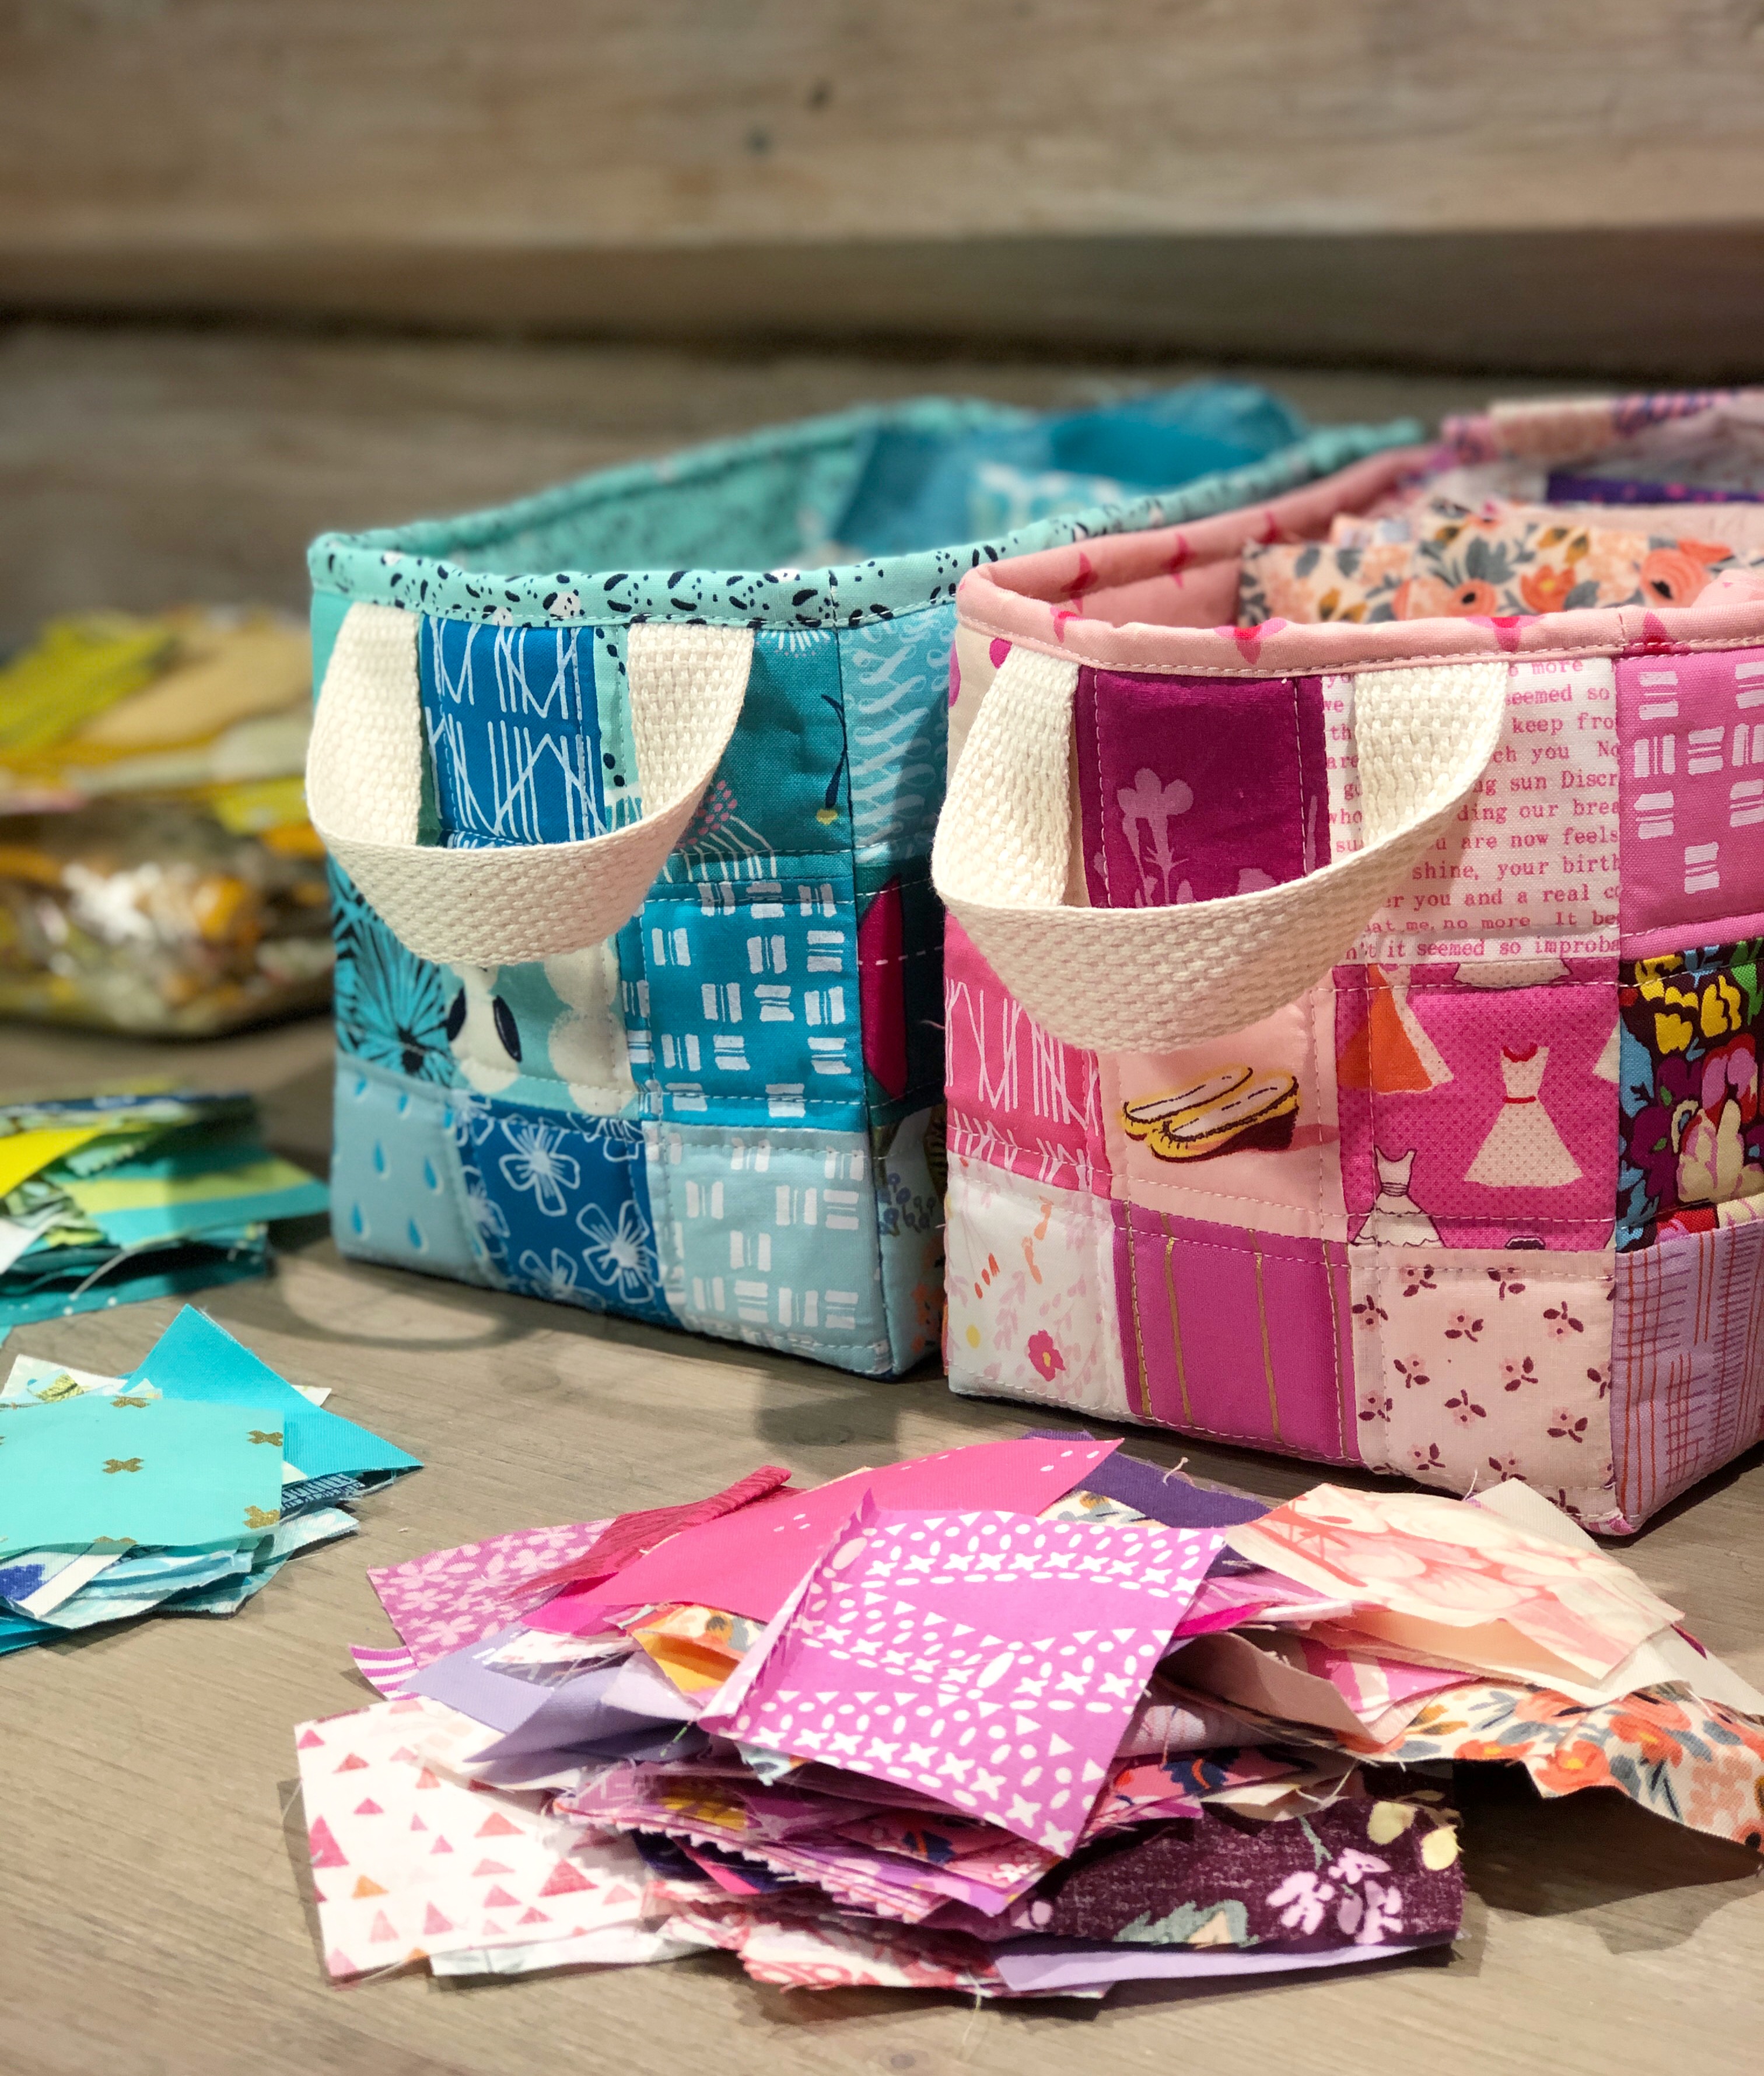
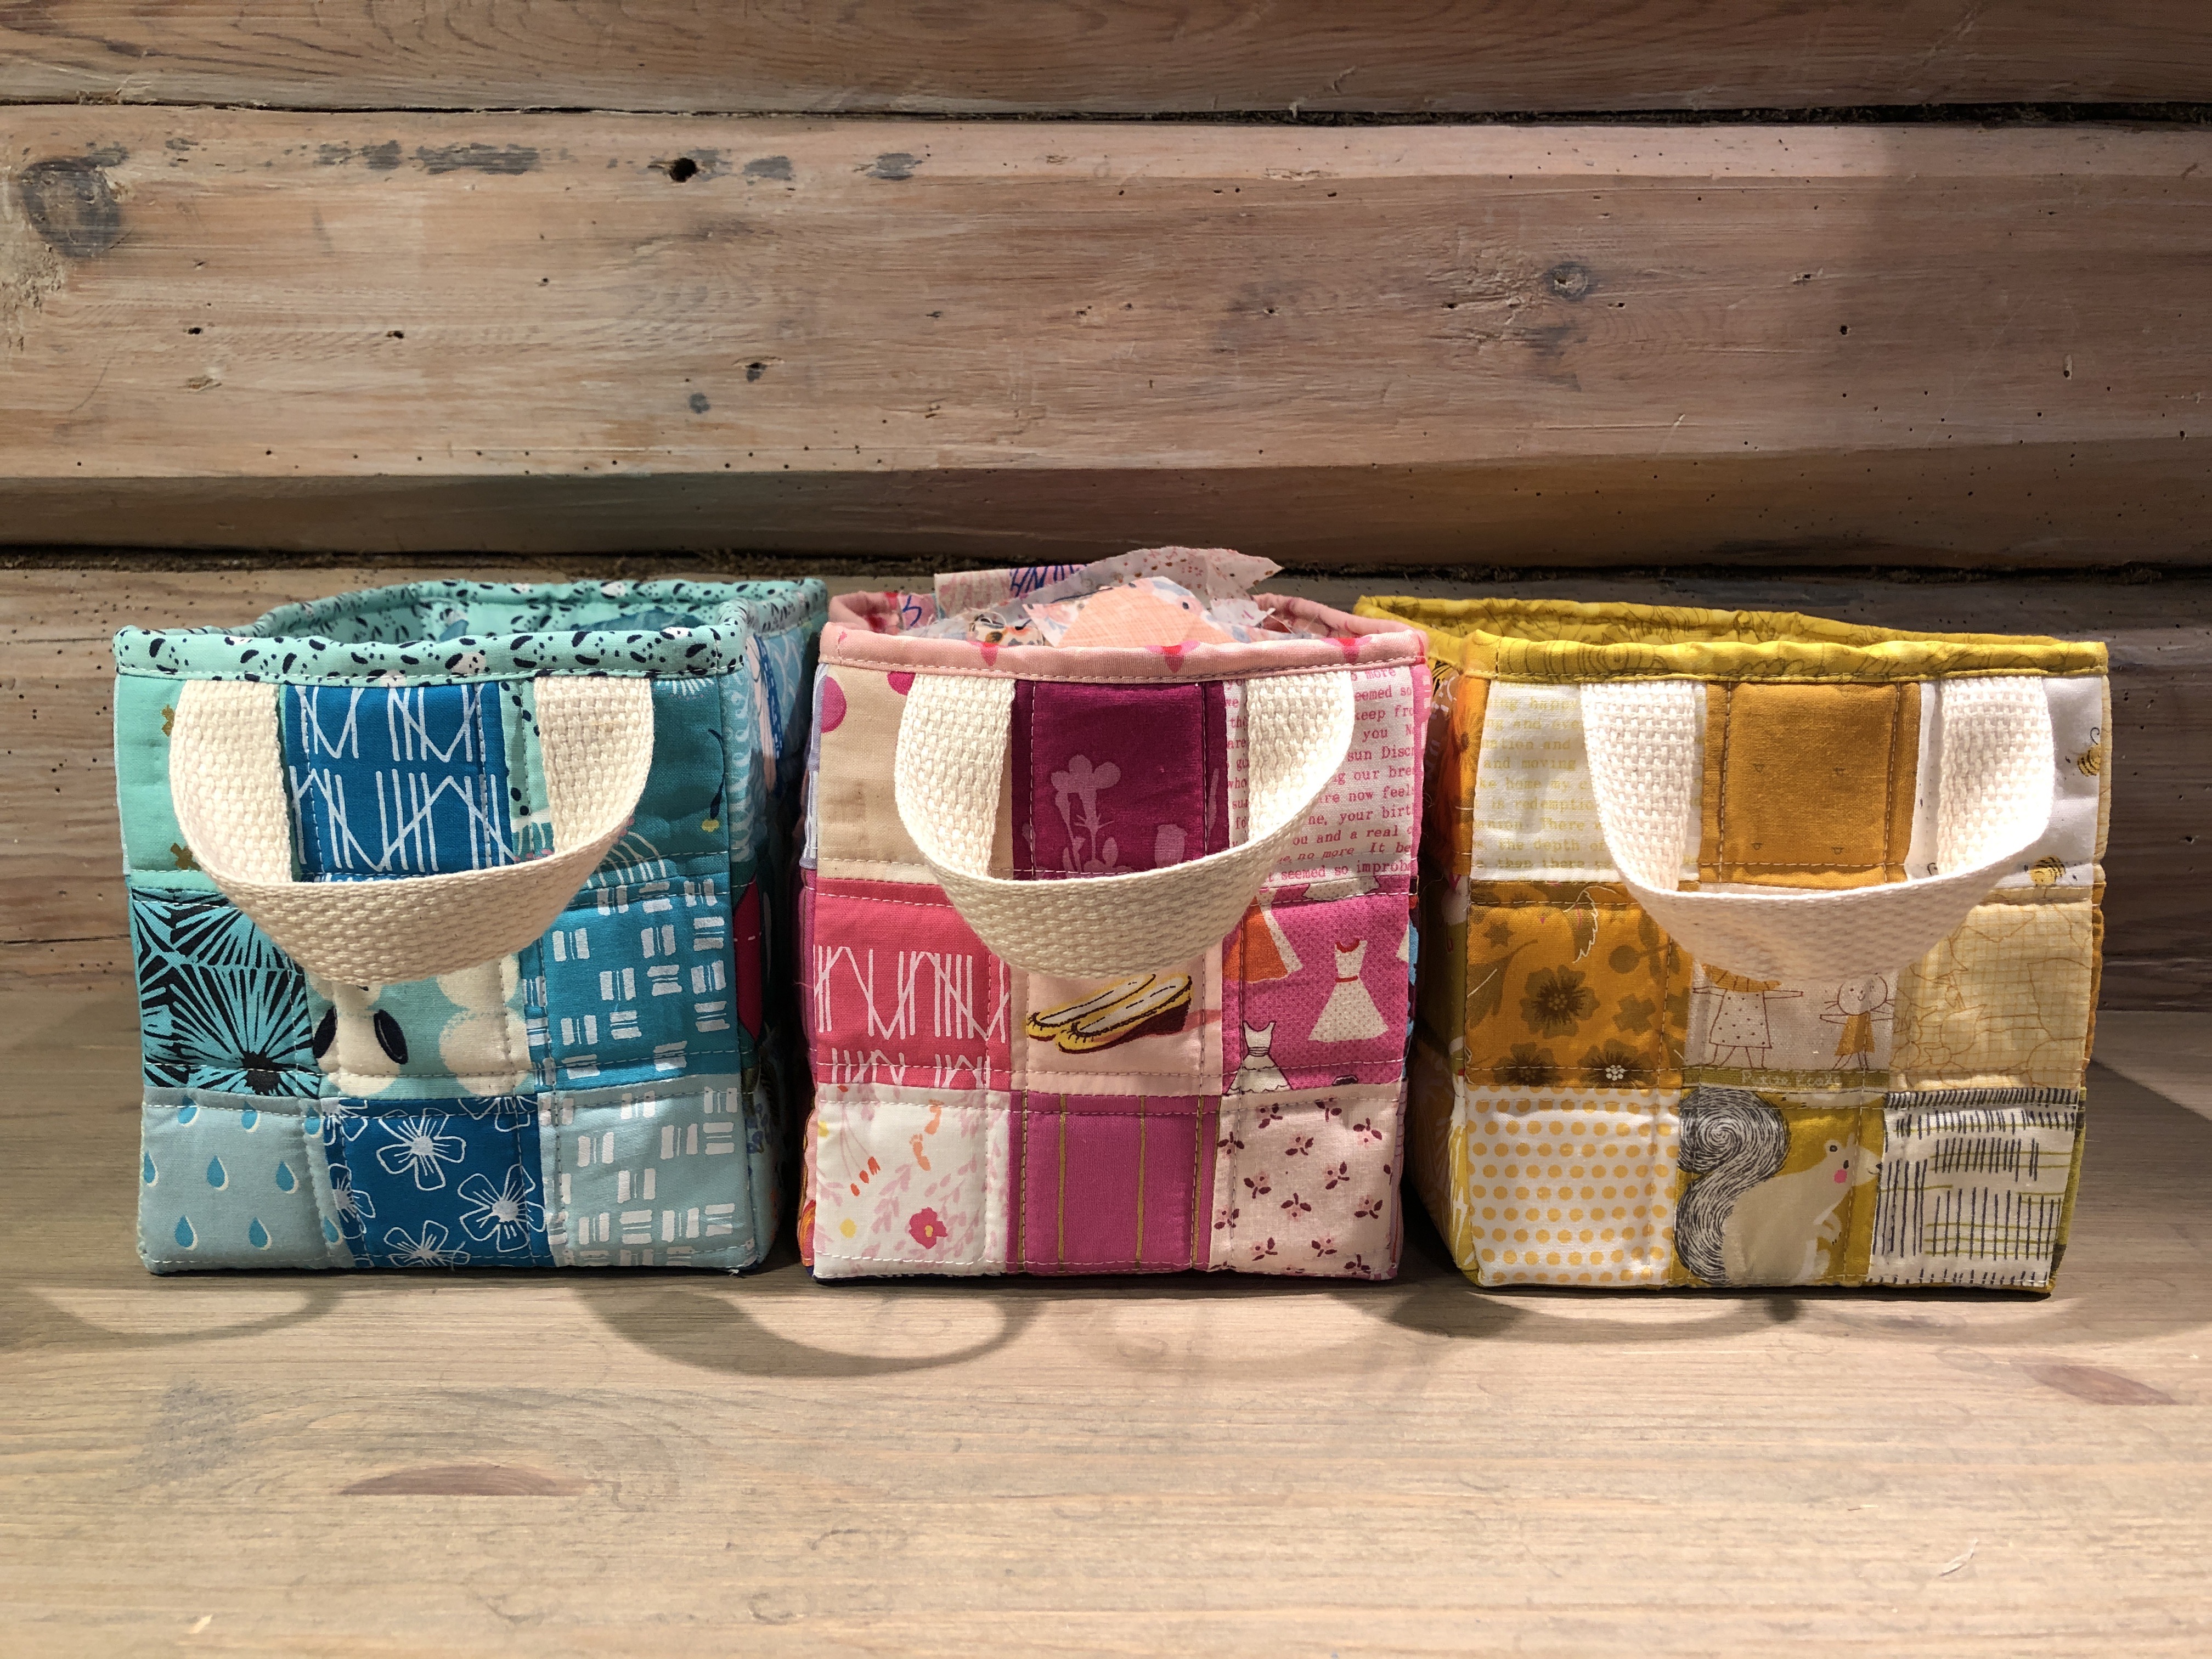
In January I made these simple but oh so useful baskets. The exterior is made entirely out of scraps from my stash, and I store the rest of the scraps of coordinating colours inside the finished baskets. Needless to say, by now I have a rainbow of scrap baskets!
I originally posted a tutorial for this basket on Instagram. I have gotten some requests to make it available for anyone outside of Instagram, so here it is, in a blog format!
Finished size: If you follow this tutorial exactly the basket will be 6 inches tall, 6 inches wide and 9 inches deep. It is easy to alter the size simply by altering the number of 2,5” squares in each row or column. To estimate the finished size before you sew you can subtract/add 2 inches to the finished measurements, per square you are subtracting/adding.
Part 1 – Preparing and sewing patchwork panel
Gather your supplies:
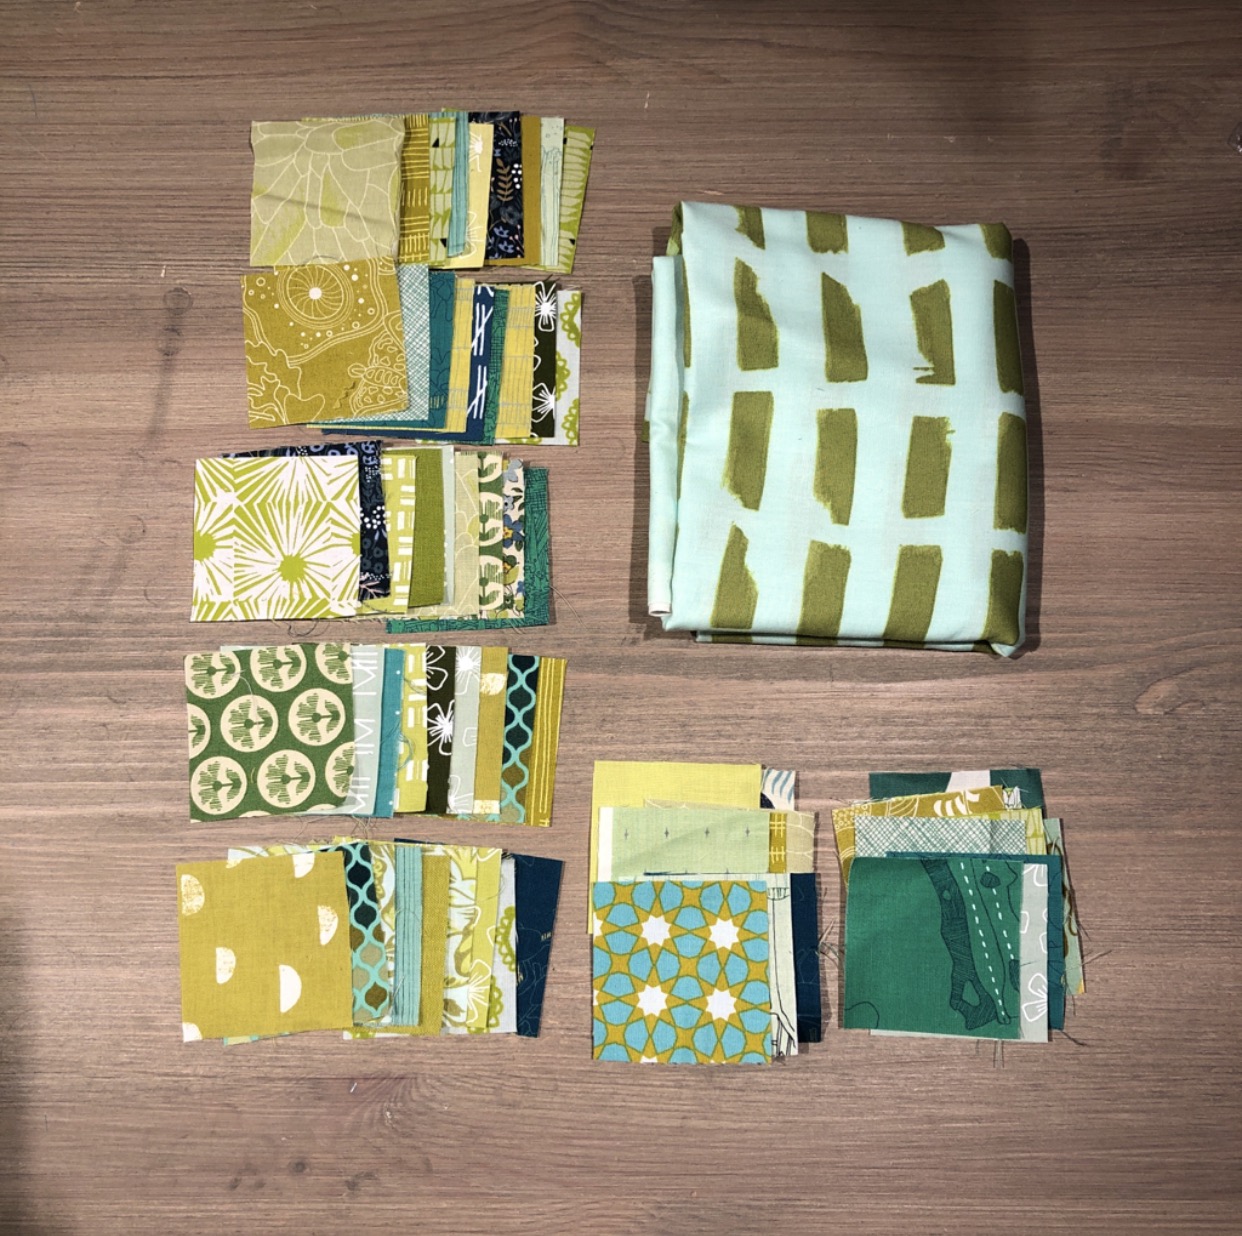
- 2,5 ” squares of quilting cottons in varying prints, 63 in total
- 1″ Cotton webbing (2 pcs 8 inch long)
- By Annie’s Soft and Stable (or similar foam interfacing)
- Binding clips
- Matching thread for topstitching
- Lining fabric
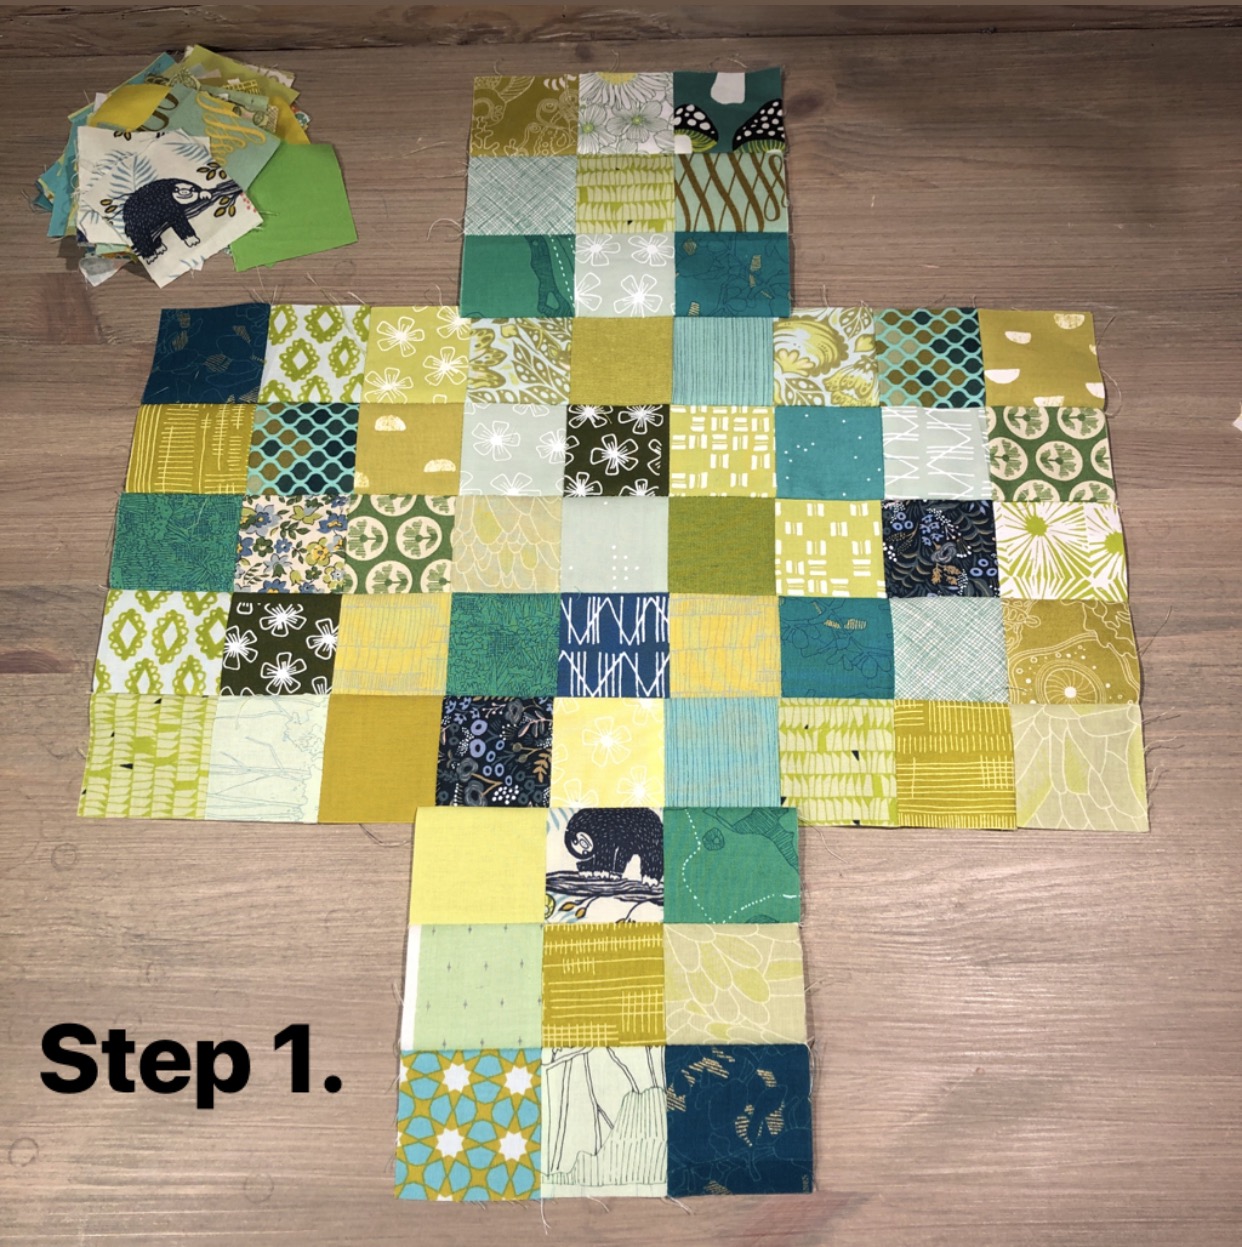
Arrange the 2,5″ squares in a 9×5 grid pattern.
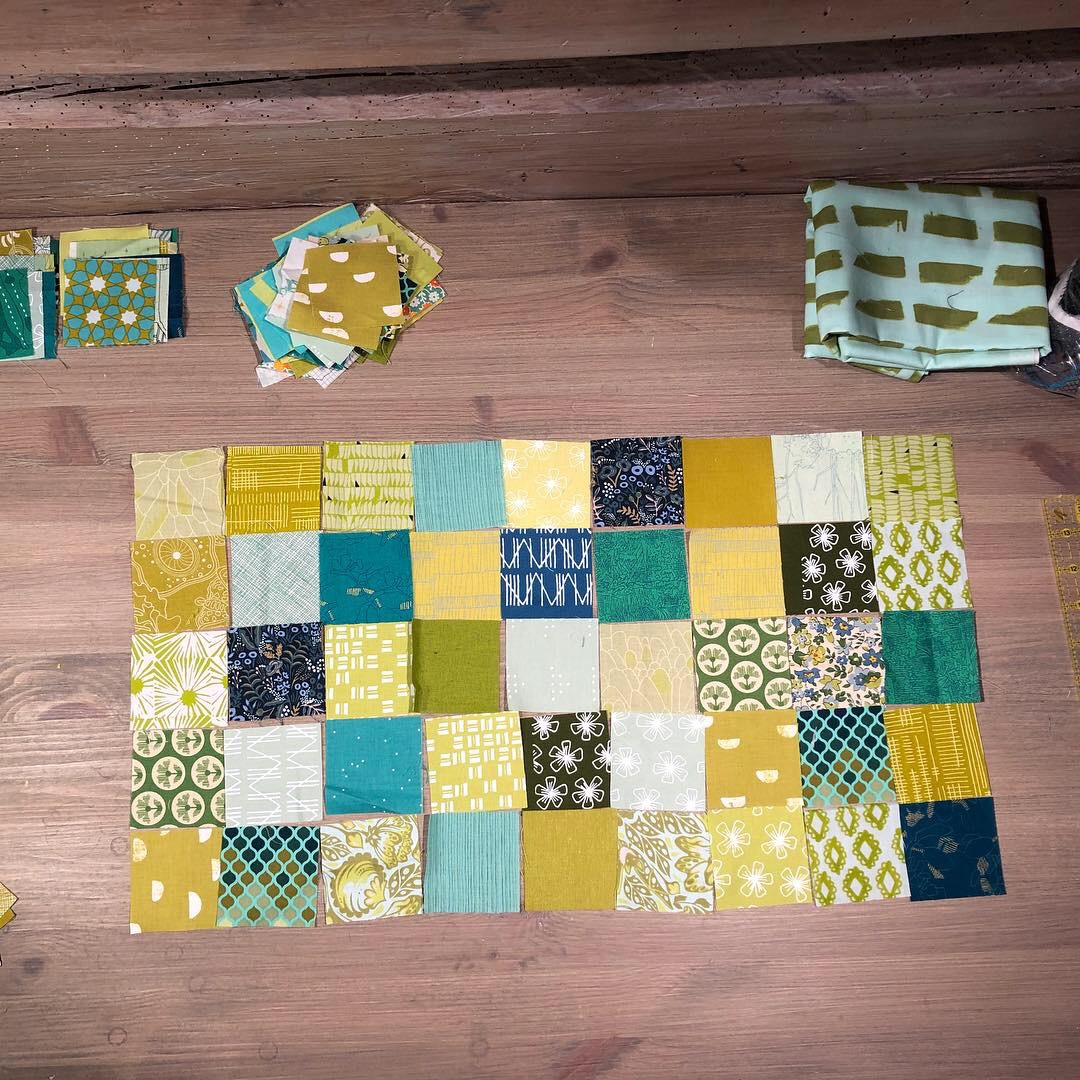
Lay out a nine-patch (3 x 3 grid) to the centre top and bottom of your patchwork panel. These will be the basket’s back and front, so pay close attention to these. The left and right side of the patchwork panel will make the two sides, and the centre 3 x 5 pieces will be the underside.

Gather the pieces as you need, to make sure you sew them together they way you intended.
Part 2 – Make the Glorified scrap basket
Step 1. Sew the patchwork panel. Sew with a 1/4″ seam allowance (used throughout, unless otherwise noted). Sew the 9 x 5 grid panel first, then make the two nine-patch blocks. Centre the two nine-patch blocks on each side of the panel, and sew each one. Press away from the centre.
Step 2. Cut your interfacing to the same size as your panel, around 18,5″ square with 6″ square corners cut out. Baste the panel to the foam interfacing (I used a glue pen and simply dabbed some glue on, basting row by row).

Step 3. Quilt as desired! Denser quilting gives a firmer basket. I quilted straight lines on both sides of each seam, about 3/16″ away from the seam lines. Baste the panel to the foam interfacing along all the outer edges.

Step 4. Cut your lining to the size of your quilted panel. Now it would be wise to skip over to step 6, and then go back to step 5, that will make it easier for you! I just did this in the “wrong” (as in most difficult) order when I made the pictures for this tutorial.
Step 5. Sew the corner seams of the lining and the exterior. Use a generous 1/4 inch seam allowance for the exterior, and a 3/8 inch seam allowance for the lining. Press the seams of the lining open.

Step 6. Baste the handles onto the top edge of the front and back sections, centered. I spaced the webbing ends 2 1/4″ apart from each other, and found that to be a good fit.

Step 7. Place exterior and lining right sides together, lining inside exterior. Sew all the way around, but remember to leave a 5″ gap along one of the longer sides, to allow for turning the basket right way out. Backstitch at the beginning and end of the seam.

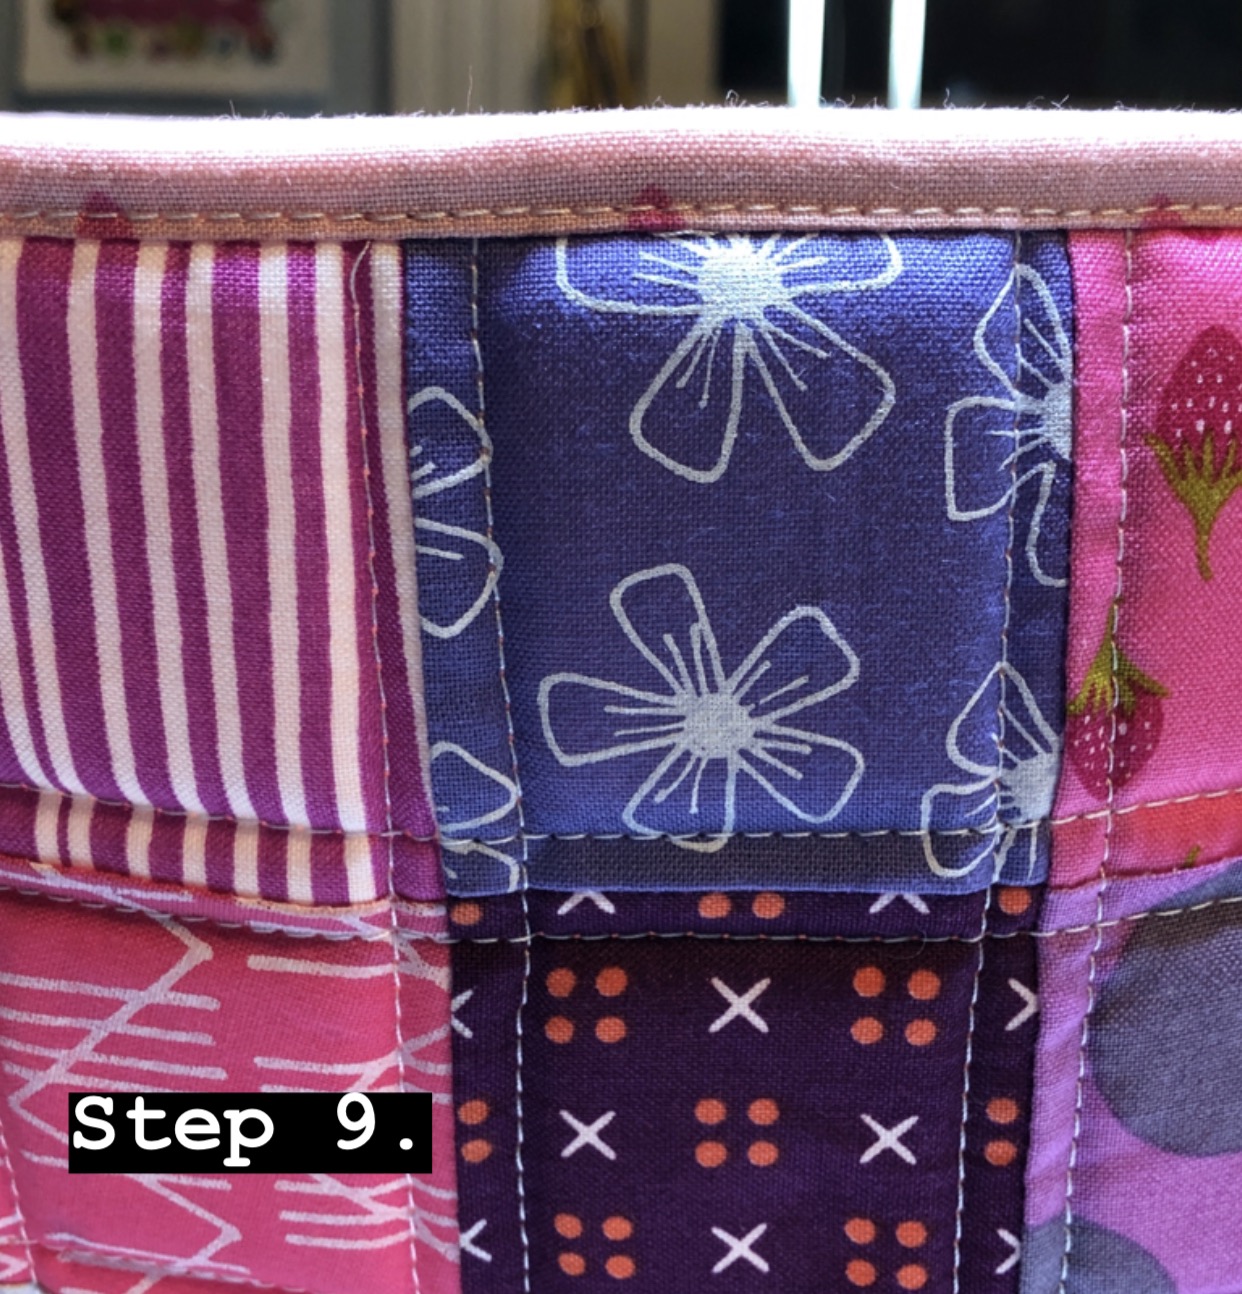
Step 8. Turn right sides out, push the lining into the basket. Do not fold the upper edge down! Instead let the lining show on the outside, and use clips to create an even faux binding about 1/4″ – 3/8″ high, around the entire basket. Carefully fold the opening closed as well, mimic the way the rest of the binding looks to get an even result.

Step 9. Sew around the outer edge, close to the seam (or sew in the ditch if you prefer), closing the opening in the same process.
Now give your basket a nice press and it is ready to be put to use!!! Store your valuable scraps or anything else you fancy in these practical baskets, and you will be organised in no time!
A little optional final tip: If you want your corners to look nice and sharp, simply fasten 2-3 binding clips on each exterior corner and leave them on over night.

❤️❤️❤️ these fun simple projects!! Thank you!!!
LikeLike
Thank you Becky, I’m glad you like it!
LikeLike
Very nice ideas to use scrap i always making bags out of waste this is very useful tutorial
LikeLike
Im so glad you like it! I love using my scraps, especially if I can make something both pretty and useful out of them!
LikeLike
Great tutorial! Very easy to understand. Thank you for sharing😀
LikeLike
Thank you for your kind feedback, I’m glad you like it!
LikeLike
They are so cute. Thanks for sharing
LikeLike
You’re welcome, I’m glad you like it!
LikeLike
Very cute baskets only question what is cotton webbing
LikeLike
Thank you! Cotton webbing is what is used for the handles. It is like a wide ribbon, with a woven appearance, with large threads. Webbing comes in some sort of plastic too, I just prefer the cotton type. You can also use leather or cork fabric to make the handles, or simply make them out of fabric!
LikeLike
Love it – thank you so much
LikeLike
Than you for your kind feedback, Rhonda!
LikeLike
It’s so cute! What size is the finished basket.
LikeLike
Hi Karen! Thank you! I am sorry I didn’t put that information on the blog. I will make an update. The finished dimensions is around 9 x 6 x 6 inches.
LikeLike
Thank you for sharing this. Very easy to follow and cute end product.
LikeLike
Thank you Barbette, I’m glad you like it!
LikeLike
Thanks for the tutorial, I’ll be making some now that I know how. Would you post the finished size please?
LikeLike
Yes! I’ll go edit the post right now. Finished size is roughly 6x6x9 inches.
LikeLike
Very definitely will try this as could be used for knitting or a seeing box thank you for sharing
LikeLike
Thank you, and you are most welcome! I hope you find the basket useful, I sure did after I made mine (6 for now, just 3 more to go!!).
LikeLike
Very cute! So glad you shared this! I’ve been wanting to make some fabric baskets for awhile, and your tutorial will “get me going”! Thank you!
LikeLike
Thank you, I’m so glad you like it!
LikeLike
Thank you for sharing these cute baskets! I want to make one!
LikeLike
Thanks for sharing. I would like to make one!
LikeLike
Please do, the baskets are a lot of fun to make!
LikeLike
Thank you for sharing. These baskets are just the cutest. I know now what I will be making to try to make a dent in my stash!
LikeLike
Thank you, I’m glad you enjoyed the tutorial and I hope that you’ll be able to make a real dent in your scraps stash!
LikeLike
Love these. Just about to start but I have a question. Did you cut the lining slightly bigger to compensate for the top faux binding? I feel that it wouldn’t fit into the bottom correctly otherwise, if you get my drift?
LikeLike
Hi Sandra! I understand what you mean! I did not cut the lining any bigger but you certainly can! The measurements given in the tutorial will rightly make the lining a little bit small, but I find that when I fill it with scraps it’s no issue. I try my best to avoid a baggy lining but I may have pushed it a bit too far 😉
LikeLike
Maria
I just became aware of your blog. I saw the basket pattern and wanted to download a copy so I could save it for later. My internet connect is very poor and I loose connection frequently. Can you tell me how I can get a downloaded copy. Thanks
LikeLike
Hi! I’m sorry I do not have a downloadable version of this tutorial yet. I have gotten several requests for it, so I may create one in the near future.
LikeLike
Great instructions on a very cute basket! Might make a few on this snow day in the Midwest!
LikeLike
Thank you, I’m glad you enjoyed the tutorial!
LikeLike
Well now I just want to race to my sewing room and create a rainbow of baskets for my small scraps! Thank you so much for sharing the HOW to do it as I am a person who needs a pattern or a tutorial – Thank you again.
LikeLike
Thank you so much for your kind feedback! I’m glad the tutorial was helpful for you 🙂
LikeLike
Beautiful work! Sometimes I wish I knew how to sew because I have many ideas that I wish to actualize but I am not a master of any particular creative craft. I can do so many things but just at the mind level. All the best in your creative pursuit.
Could you please share which sewing machine do you use.
LikeLike
Hi! I mainly use a Janome 1600P QC, it’s a straight-stitch-only machine! Try sewing, I’m sure you’ll like it, and there’s a lot of free tutorials and advice available!
LikeLike
I would love to know where some of the fabrics came from that you used! It seems like it’s so hard for me to find cute ones! Thank you in advance!
LikeLike
Many sewing machines that do a straight stitch only are available on many sites (Craigslist, Nextdoor, free cycle, all in US; and sites with names I don’t know in other countries). Most are quite inexpensive, but be sure they work properly before you invest anything in them. Find out if you enjoy trying to carry out your ideas… you might not enjoy the actual work at all. But you might love it. Different people will like different brands of machines. Get a cheap working one first, try yourself hand at it, then inquire about brands later.
LikeLike